When Written: Feb 2014
My last two articles have mainly covered the development of mobile apps built using HTML5 and JavaScript. By using these technologies it is possible to write one piece of code that will run on iOS, Android and Windows Phone 8 platforms as well as in a desktop browser. This ‘write once run anywhere’ has for a long time been a holy grail of software development and it seems we are getting close. Once tested, the app can be submitted to any or all of the various app stores and here you need to make the decision of how you might make money from your labours. You could simply charge for it, but this can be met with resistance by prospective users as they cannot evaluate your product first.
A better idea is to offer it free either for a time limited period or entice users to upgrade at a later date to the ‘pro version’ for a fee which would give them extra features. These pricing formats are well known, but there is a further, fairly new one available for you to offer to your users and this is ‘in app purchases’ or IAPs. These are usually used by the game producers, where the initial game is often free and can be played perfectly well without paying a thing. But if you want to unlock extra features or move up levels more quickly, you can simply buy these abilities with an in app purchase. This way you can beat your friends who are also playing a particular game, by simply paying for increased powers or speeded up game time or any other form of enhancement that the developer might consider offering. Now don’t think we are talking a revenue stream of a few pence per user here; on Candy Crush Saga for instance, the purchases range from 69p to 1.49 while on the highly addictive and very competitive multi-player combat strategy game Clash of Clans a chest of Gems will set you back £69.99 and you can buy more than one of these! At my local Indian restaurant I was chatting to another diner, and it turned out that the guy had just spent over £100 just so he could beat his friend at Clash of Clans! So as a developer you can start to see that there could be a very healthy revenue stream here!
In-game purchases have had a bit of bad press because of children playing such games and being offered a paid for bonus. The child apparently is not aware that it will cost ‘real money’ rather than ‘game money’ and after a while they manage to max-out the parent’s credit card! In reality the device with the game on has to be set to allow IAPs and also the child will need to know the parent’s app store password as this will pop up before the transaction is completed. Obviously there may be scenarios where perhaps the child is allowed to make a small purchase and the parent enters the app store password, which is then not asked for again by the game for the duration of the playing session. But even if this is the case I do find it difficult to believe the amounts that get reported by the tabloids unless the child does know the password, in which case the parents are at fault and not the game developer. Perhaps the apps should make it quite clear that these in-game items are being purchased with ‘real money’ and not game money, but the ones I have had experience of do just that. However, I do think that one could argue that the parents should not give ‘little Johnny’ and ‘the Princess’ the password to their app store account.
There are limitations as a developer as to how you use IAP and you need to familiarise yourself with these for each platform you are targeting your app at. You cannot for instance, use IAP to sell physical items or real world services and if you create a virtual currency to use within your app then this must not time expire. In-app purchases are certainly here to stay and can represent a good revenue stream for the developer. Does this mean that you will have to give up on your HTML app and resort to re-writing it in the native code of the mobile devices that you are targeting? Not a bit of it, there are several different ways of adding IAP to your HTML5 app. One that I will take a look at is using the rather excellent HTML 5 mobile development tool by Intel called XDK that I have written about before (issue 232 and 234 ) .

1Touch is a cloud based service that allows you to add in-app purchases to your XDK based app
XDK’s answer is to use a cloud service called ‘1Touch’ which is part of the group of such services in appMobi which is accessed and useable via XDK. How 1Touch works is when your user downloads your app via the store, a unique ID is generated and stored in the digital wallet on the mobile device, then if within your app the user selects a ‘buy now’ button the ID is passed securely to the cloud servers and once verified a further key is passed to the merchant’s server for processing. The amount of code you have to write in your app is minimal, something like:
First add a reference to the 1Touch JavaScript library.
<script type="text/javascript" charset="utf-8" src="1touchlive/onetouch.js"></script>
Then in your code for the IAP button you call a function to make the purchase:
function oneTouchPurchase() {
OneTouch.buy('diam10',1,paymentSuccess,paymentFail);
}
Obviously you need some code to handle any problems that may cause the transaction to fail:
function paymentFail (evt){
AppMobi.notification.alert('Purchase of ' + evt.product + ' failed. Please try later. ','Purchase Not Successful','OK');
}
But all being well the transaction should proceed successfully and money will appear in your account!
function paymentSuccess(product){
AppMobi.notification.alert('Congratulations on your purchase of ' + product,'Purchase Was Successful','Awesome!');
}
As you can see the code is pretty simple, but before it will work and the transactions complete you need to complete two major steps. The first is to add your ‘products’ to the 1Touch app that you have created in the appMobi cloud. These can be considered more like web services that your other apps can call to give it extended functionality. There are other modules that will give you the ability to run leader boards for mobile games as well as an advertising engine and a push messaging service, but for now we are just interested in the 1Touch module.
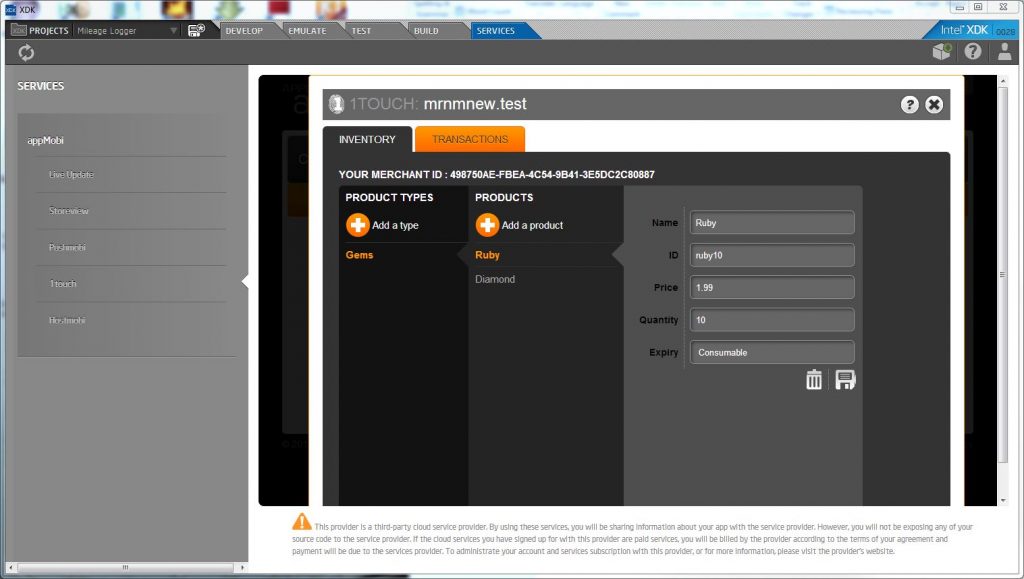
Once you have created an account in appMobi you can then create an application simply by clicking the button and after doing this you can select the type of service you wish to use, in this case 1Touch. After selecting this you get the opportunity to add ‘products’ and you can also group these products to organise things a little better. In my little test I created a group called ‘Gems’ and added two products; one called Ruby and the other Diamond. Within the screen for creating products you have to fill in several boxes one each for ‘name’, ‘ID’ , ‘Price’, ‘Quantity’ and ‘Expiry’.
You will need the ID that you entered for each product later so make a note of each one. The ‘Expiry’ field currently has just two options; ‘Consumable’ and ‘NonConsumable’ this is for product types, there are more but currently 1Touch just offers these two. Consumables are for things that will get used during the use of your app, like perhaps minutes of a VOIP call , whereas NonConsumable product types would be used for items like ‘power up’ items to move up a level. There are other types which are used for differing types of subscription renewal that can be defined for iOS apps and these are outlined in https://developer.apple.com/library/ios/documentation/NetworkingInternet/Conceptual/StoreKitGuide/Chapters/Products.html.
Having added all the products that you app will offer, the next and rather repetitive stage is to log into each of the app stores that you are offering your app on and re-enter these products in there so that the store knows how to handle to payments. It is very important that you use the same product ID that you set up earlier in each of the stores, you did make of note of these didn’t you?
Your app should now be able to handle IAPs but there are a couple of things you need to make sure of before you make the thing live. The first is that your app has the ability to restore any IAP in the event of the user having to reinstall their device, this is now a requirement for all iOS apps, this can be easily done with the 1Touch system and the guidelines are here http://docs.appmobi.com/index.php/1touch/restore-in-app-purhcases/ as with any form of ecommerce it pays to read the small print, boring though it may seem at the time.
Each of the app stores will take a commission for each IAP sale, Apple, Google and Microsoft all take 30%, although with Microsoft, if your app exceeds $25,000 in sales the percentage Microsoft takes drops to 20%. Bear in mind also, that your HTML5 mobile app can be submitted to the Windows Store as a Windows 8 app by many of the development tools including XDK which could provide you with a larger customer base. The tricky part of setting all this up is the testing. You don’t want to test with live payments because although most of the money will be coming to you, you would also end up paying that 30% to the app store holder.
The procedure for setting things up for testing is different for each platform but they do provide clear guides on the steps you have to follow. There isn’t the room in this article to detail the various stages, but basically it involves setting up a test user account and registering this with the app store, you then use this account as a dummy user which is able to produce ‘fake purchases’ from within your app.
I think that it is fair to say that the apps that would generate the largest revenue from in-app purchases are games. Most developers would love to build the next Farmville or Candy Crush Saga but you might think that the HTML5 route to coding would not give you the performance that your users expect, particularly on older devices with slower processors and JavaScript rendering engines. This is not necessarily the case, you still don’t need to resort to native code but instead use a game specific build service like Ludei’s CocoonJS system (https://www.ludei.com/ ). This is a rather interesting product, where you write your app in HTML5 and JavaScript as normal using whichever of the frameworks you prefer. You then upload it to CocoonJS Cloud based build service and an optimised version of your app is built for each of the mobile platforms.
The performance of the demos are pretty impressive, take a look at https://www.ludei.com/showcase/ for examples of HTML5 games built with this system. What CocoonJS mainly does is provide an environment for accelerating the performance of the Canvas element in HTML5. The performance of HTML5 games can be an issue particularly with iOS and Android platforms, so it important that your app uses the Canvas object rather than Divs as these are not supported, so whilst their claim that you don’t need to re-write your code is sort of correct, it is best if you start off correctly to get the best out of this system. A very basic HTML5 CocoonJS compatible code might look something like:
<html>
<head>
<script>
window.onload = function()
{
// Create a canvas and draw something in it.
var canvas = document.createElement("canvas");
canvas.width = 640;
canvas.height = 480;
var canvasContext2D = canvas.getContext("2d");
canvasContext2D.fillStyle = "red";
canvasContext2D.fillRect(0, 0, canvas.width, canvas.height);
document.body.appendChild(canvas);
};
</script>
</head>
</html>
This will create a red box of 640 x 480 pixels, nothing great but it does show how you might have to code your app the get the best from CocoonJS’s performance increase. There may come a time when CocoonJS does support acceleration of other HTML tags or another product competitors in this area, but in the meantime the examples of accelerated HTML games that I have seen running on mobile devices does suggest that the extra effort required in programming is worth it. There is a good development guide on their web site at http://support.ludei.com/hc/en-us/articles/200767118-Development-Guide .
There are three main ways of writing your HTML5 game. The first is to code everything yourself, and whilst you will end up knowing more about JavaScript and HTML than is probably healthy, a faster way is to use a framework like ImpactJS (http://impactjs.com/) and code with that, this product also comes with the Weltmeister level editor to make it easy for you to design the various game levels that you will need, along with ‘Ejecta’ framework to help you to publish your game to Apple’s appstore. But if you want to avoid coding then game builders like Construct2 (https://www.scirra.com/construct2 ) can be a good choice and whilst they can be limited in what can be produced they can be a good way to get started.

Construct2 is an impressive non-code way of building HTML5 game apps
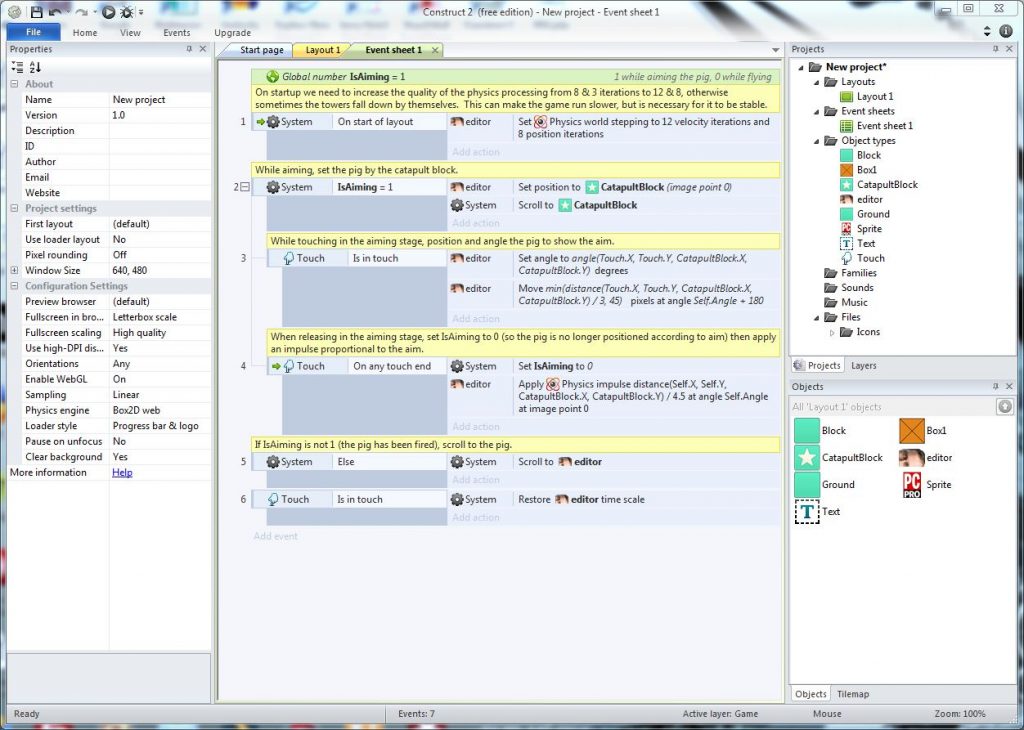
Both ImpactJS and Construct2 have free versions but to use them to make your fortune they will cost you $99 and £259 respectively. I was particularly impressed with Construct2, the quality of the games it can build is impressive and it has a variety of export options to cover most platforms. Construct2 presents the developer with an environment like Visual Studio and a selection of bundled graphics, sound effects and music so you can start designing immediately, then spend time honing your games’ gameplay and finally redesigning and customising your graphics.
Initial development of laying out the screens, editing and positioning graphics is extremely quick and intuitive. Very soon you can see what your game will look like. I did find the drag and drop event builder, whilst being easy to use, the terminology used for some of the events was puzzling this and trying to figure out how the demo games were built did make me reach for the tutorial videos on several occasions. This is expected when you are presented with a new development environment but I do feel however that this one is worth learning and I shall certainly be attempting a more serious project with it in the near future.

The large number of export options in Construct2 means you can target most mobile and desktop platforms
When you start a new project with Construct2 you are offered several projects types including ones suitable for importing into Intel’s XDK and CocoonJS builder service, however when your app has been designed and tested you have an option to export to these and others as well so you can change your mind at that stage. Although the idea is to have a code-less developing environment the guys at Scirra have also published a full SDK API should you want to extend it via plug-ins which you can write yourself. You can add in-app purchases to your Construct2 app as long as you are using the paid for version.
Whilst the free version is good enough to have a ‘play’ I consider that you would soon be buying the full version for £259 as the limitations on the free version are such that you could only build the simplest of apps. This is not an issue as it is fine for finding out what the product can do and if it is worth parting with your hard earned cash. Construct2 is written by a small British based company called Scirra (https://www.scirra.com/ ) and, like the ImpactJS framework, it will only create 2D HTML based games, so whilst you will not be able to build the next Call of Duty, a second Candy Crush Saga or Angry Birds is quite within its capabilities. One nice feature that you don’t often find in these ‘easy to write’ programming environments is a full debug capability with the ability to watch variables, pause, single step and lots of capabilities; many of these, however, are only available in the paid for version.

Not the best game, but fun to make!
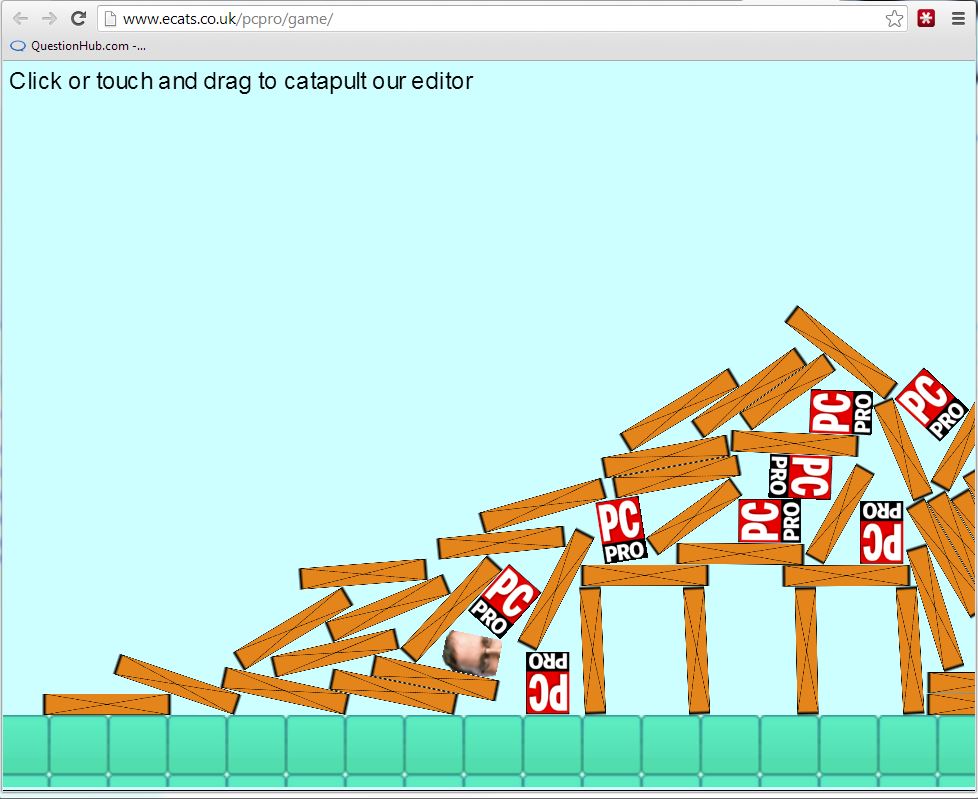
If you want a laugh I have knocked up something very quickly at http://www.ecats.co.uk/pcpro/game this is my version of the first screen of Angry Birds but in this you catapult our illustrious editor instead of a bird! It’s not a great game but it did only take five minutes to build!
I think for many Construct 2 could be a great way to get started developing HTML games and I urge you to take a look.
Article by: Mark Newton
Published in: Mark Newton
